

How to Edit Video Through Google Photos Windows 10
How to use Google Photos to edit video
After crossing the one-billion-user mark in July 2019, Google Photos is now the most popular media management tool for Android. It comes pre-installed on most smartphones and tablets, so you may already be using it to manage the entirety of your photo collection without knowing.
Google Photos has a neat offering that lets you sync an unlimited number of photos with the cloud as long as you are using the "high quality" option. It lets you add filters, readjust photos, and make collages—but did you know that it also comes with an in-built video editing function?
In this article, we will look at how to use Google Photos to edit video. You can also check out our buying guide for more information on the best video editing software.
How to use Google Photos to edit video: Preparation
You can use either the mobile or web version of Google Photos to access its video editing features. Keep in mind, however, that the editor is quite barebones and won't serve as a replacement for paid video editing software.
There is no option to add text overlays, filters, or other assets to your video. However, if all you need to do is make small adjustments like trimming or rotating your video clip to make it look presentable, Google Photos has you covered.
Download the Google Photos app on your Android smartphone to begin, or launch the app if already downloaded. If you're going to be using the web version of Google Photos, head over to its website.
Step 1: Trim your video
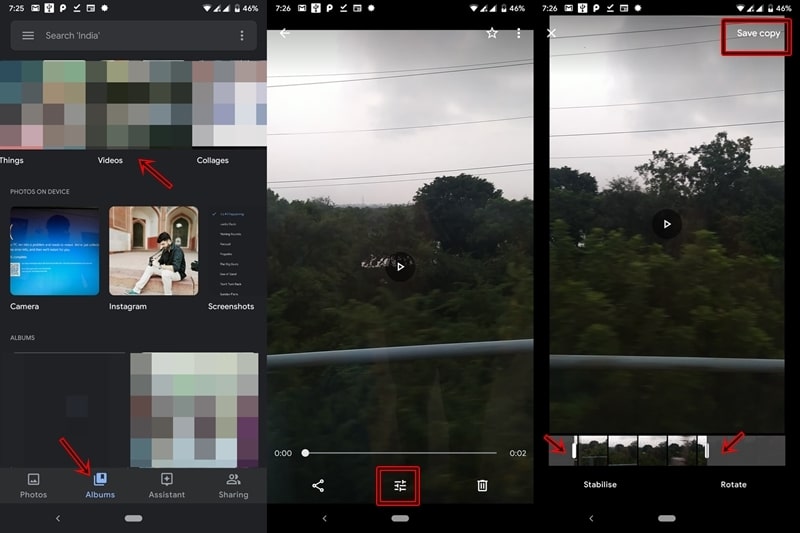
Open the app or web version of Google Photos and head over to the Albums section. Click or tap on Videos. This will take you to your video library.
Choose the video you'd like to edit and click or tap on the Edit ( ) icon. Now, you can trim your video by choosing the desired start and end points of the clip. This can be done using the available slider. Once done, click or tap on Save a copy to finalize your changes.
Step 2: Stabilize your video
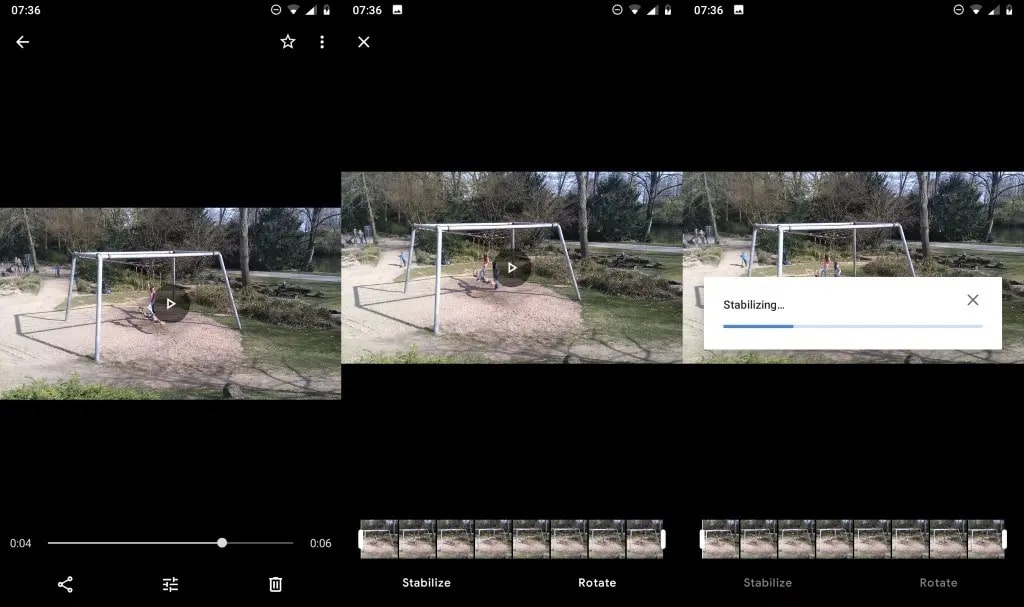
Stabilization is an editing technique used to reduce the shakiness of a video. This can be particularly useful for people with motion sickness, or just about anyone trying to make a video look professional. To stabilize your video using Google Photos, launch the app or web version of the service and go to Albums > Videos.
Choose the video you want to stabilize, then hit the edit button. Adjust the sliders to select the portion of the video you need to stabilize.
Up until now, the steps have been quite similar to how you'd go about trimming your video. Next, however, you need to click or tap on the option that says Stabilize. This may take some time to complete. Once done, save the changes using the option that says Save a copy.
Step 3: Rotate your video
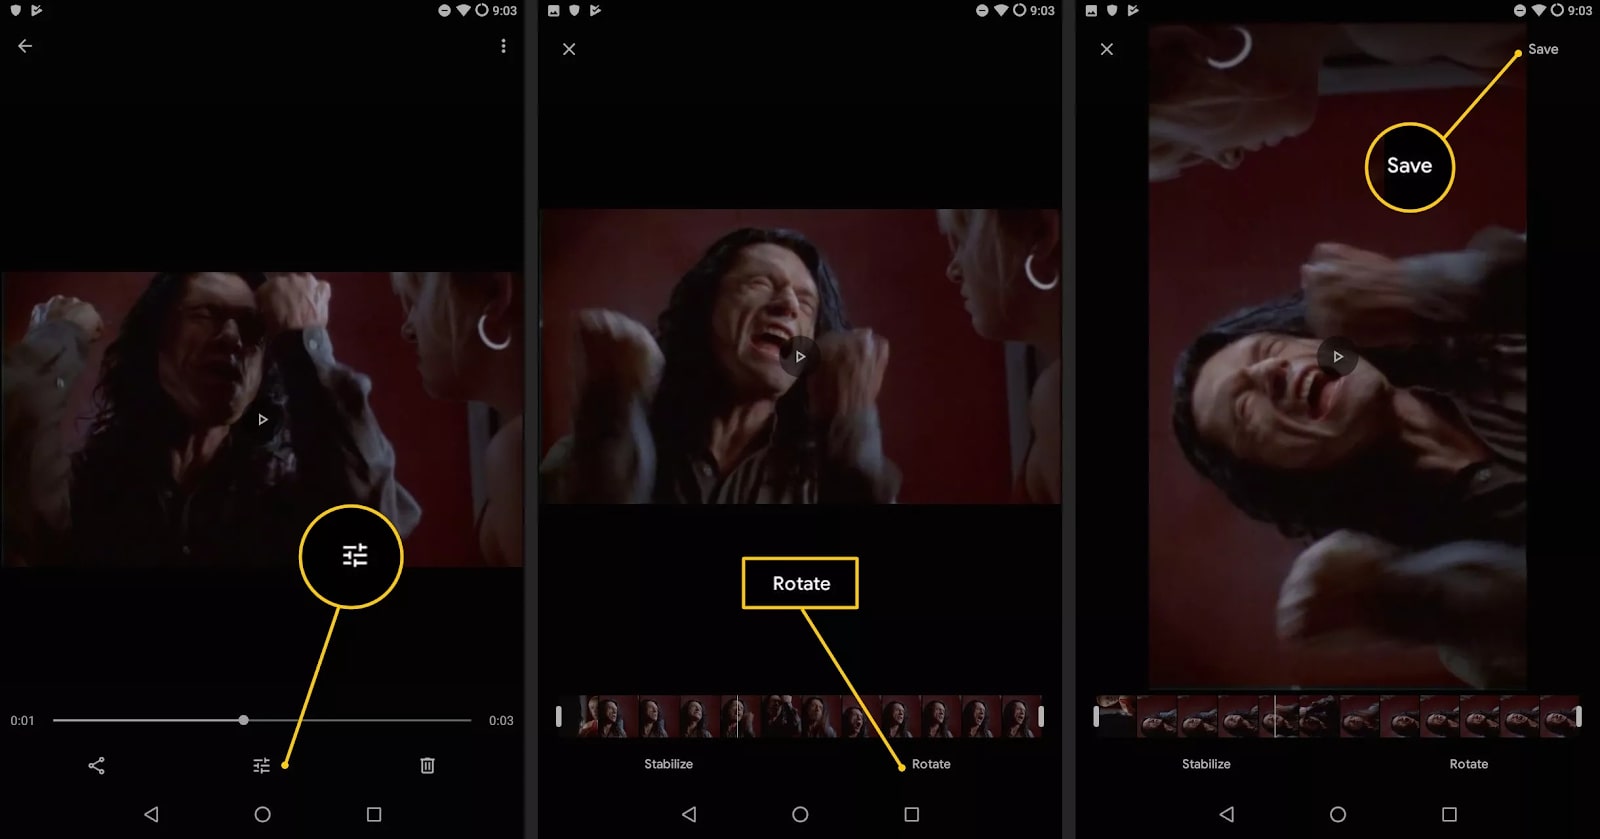
Launch the Google Photos app on your mobile or browser and go to Albums > Videos. Choose the desired video and tap or click on the Edit button.
Now you can click or tap on the Rotate option to rotate your video by 90 degrees. If you press Rotate again, it will rotate the video by another 90 degrees. Once done, use the save option as before to finalize your changes.
Step 4: Create a movie
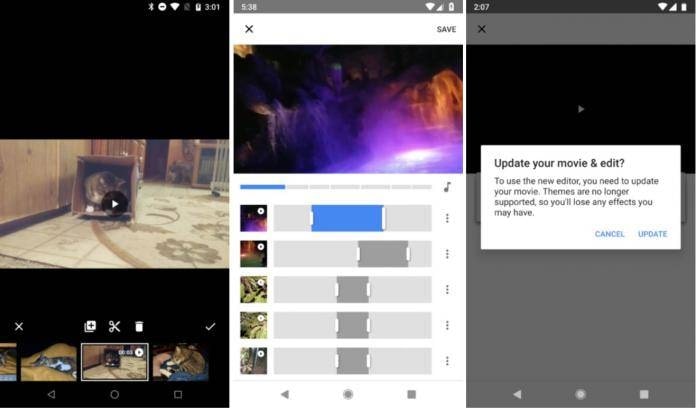
Google Photos also comes pre-packed with a barebones movie editor that lets you create a short-length film complete with its own background music. The process is very simple since no advanced editing options are made available to you.
Open Google Photos and click/tap on the Assistant icon in the bottom bar, right next to Albums. Click on the Movie option. From here, you can go in two different directions, as follows:
You can choose one of the several presets available to you. This will provide you with a template with animations and background music already added. All you have to do is add your own photos or videos to the preset and it will be done.
Or, you can build a custom movie using a preset that you create. To do this, tap on New film. Next up, you can choose a total of 50 different photos and videos of your choice. This should be sufficient for any short-length movie. Once done, click or tap on Create.
Now, it's time to add music to your video. Click on the icon and then choose from three options: 1) "My music" to add your own music, 2) "Theme music" to download and insert music created by Google, or 3) "No music" to create a silent movie.
Once done, tap on the tick (✓) icon and hit Save. Your movie is now ready!
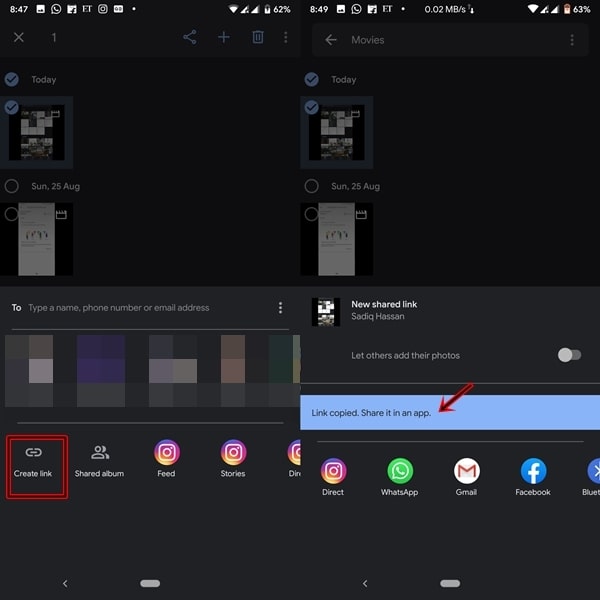
Head over to Google Photos > Albums and choose the option that says Movies. Tap and hold on the movie you'd like to share to select it, and click on the Share button in the bottom bar that appears.
You can use this option to directly upload the movie to your preferred social media. You can also use the Create link option to share a link to your video on Google Photos on your preferred social media platform.
Summary
That's it! Google Photos is easy to use as it lacks any advanced options for editing photos or videos. However, this can also prove to be a boon for novice users who don't have any experience with a video editing application. If all you need to do is make subtle changes to your video before sharing it on your social media site of choice, Google Photos' video editing functionalities can prove most useful.

Ritoban Mukherjee is a freelance journalist from West Bengal, India. His work has been published on Tom's Guide, TechRadar, Creative Bloq, IT Pro Portal, Gizmodo, Medium, and Mental Floss. Ritoban is also a member of the National Association of Science Writers.
How to Edit Video Through Google Photos Windows 10
Source: https://www.itproportal.com/features/how-to-use-google-photos-to-edit-video/#:~:text=Open%20the%20app%20or%20web,on%20the%20Edit%20(%20)%20icon.
0 Response to "How to Edit Video Through Google Photos Windows 10"
Post a Comment